Beeswax Wraps

Such a fun and pretty way to reduce the use of plastic in your kitchen! These reusable food covers are made entirely from natural materials, and they're so quick to make!
We made two versions: a very basic one, with ingredients that you are likely to have in your craft cupboard and kitchen, and a pro version that you might need to order special ingredients for.
You will need: Cotton fabric, Pinking shears, Baking tray, Greaseproof paper, Beeswax Pastilles, Paint brush, Coconut oil. Additions for the pro version: Pine resin, Saucepan and bowl to make a bain-marie, Jojoba oil (instead of coconut).

Basic version
1. Use your pinking shears to cut your fabric to size. Even if your fabric is already the size you want it's a good idea to trim the edges with the pinking shears anyway, to stop it fraying.
 One of the things with the basic version is that is that they turn out more oily and less sticky. We don't mind this so much for ramekins and snack pots, rather than bigger food dishes, so we cut smaller squares when doing this version.
2. Preheat your oven to 100° and put a sheet of greaseproof paper in your baking tray. Place your fabric on top and then sprinkle it with beeswax pellets.
 The more sensible thing to do would be to melt a handful of pellets and a dollop of coconut oil in a bain-marie first, but this is such a fun way for children to do it, noticing how the beeswax melts into the fabric.
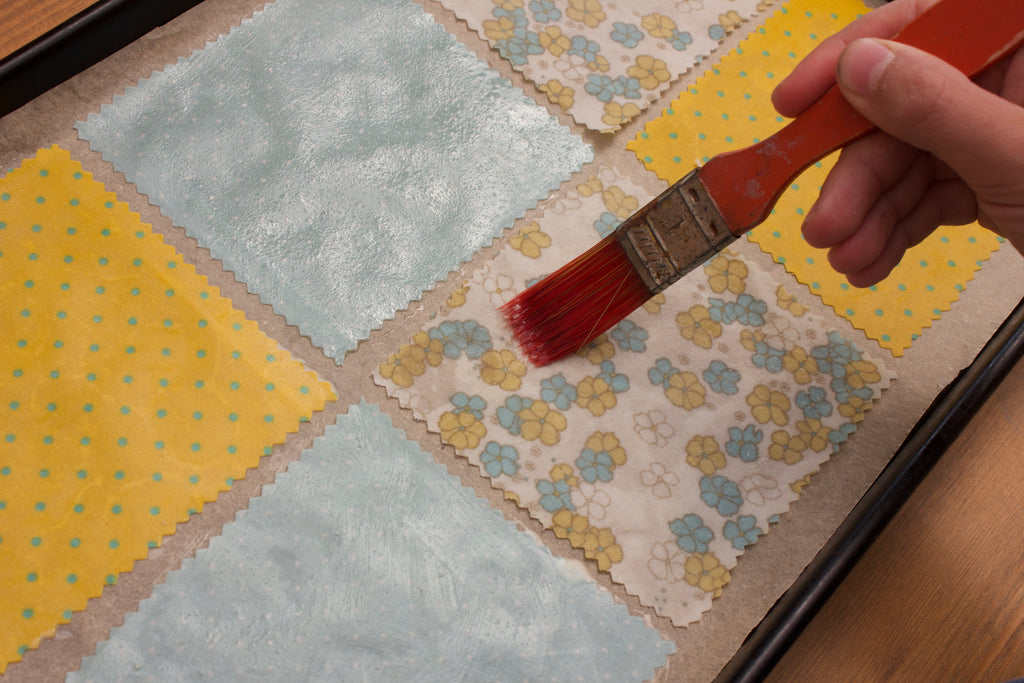
3. Pop your tray into the oven for 5 or 10 minutes. When you take it out look for patches of fabric that are still dry and sprinkle some more beeswax there, then pop it back in the oven. Next time you take it out dip your paintbrush into some softened coconut oil and spread it onto your fabric, aiming to create an even distribution of beeswax and oil.
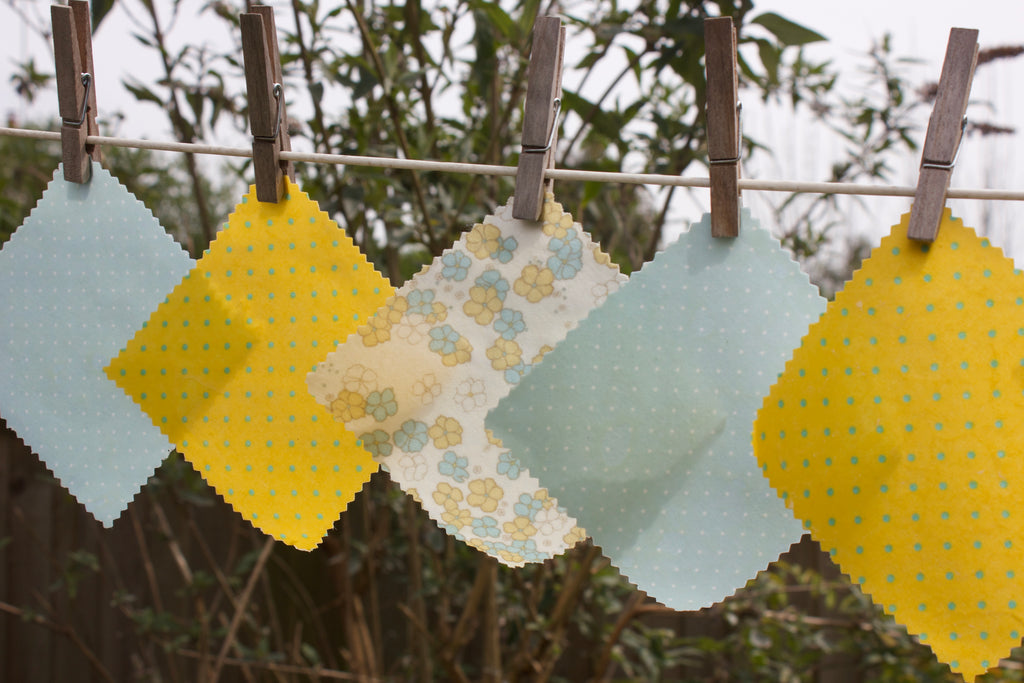
4. After a final blast in the oven, (it's amazing how quickly the beeswax starts to set), peel your fabric off the greaseproof paper as quickly as possible and peg it up to dry.
Pro version
1. As for the basic version, trim the edges of your fabric with pinking shears. Re. the baking tray, we realised that the size of fabric we were using this time was too big to fit, so we just put it on some greaseproof paper and slid that straight onto an oven shelf. This time we melted our beeswax pellets, pine resin and jojoba oil together in a bain-marie, (a heatproof bowl sitting on top of a saucepan of water).
 For about 5 wraps measuring 30x30cm use 30g beeswax, 15g resin and 1tbs jojoba oil. As you can see I added a smidge of coconut oil too, but this is not essential!
2. Once everything has blended together, dip your paintbrush into the mixture and spread it evenly over your fabric.

Do you know, I wouldn't have thought this craft was suitable for younger children, but my 3 yr old nephew stopped by and got stuck in, making himself a lovely wrap for his sandwiches!

3. Once you have spread your mixture over every part of your fabric pop it into the oven for a few moments to melt everything again. When you take it out of the oven peel it off the greaseproof paper as quickly as possible and peg it up to dry.

The wraps dry in seconds, and are ready to use almost immediately! Now, for the test, to make sure it was all worthwhile... did they to stick to our dishes?!


Yes! Bye-bye cling film and plastic tupperware, hello pretty wraps brightening up our kitchen and lunch boxes.
