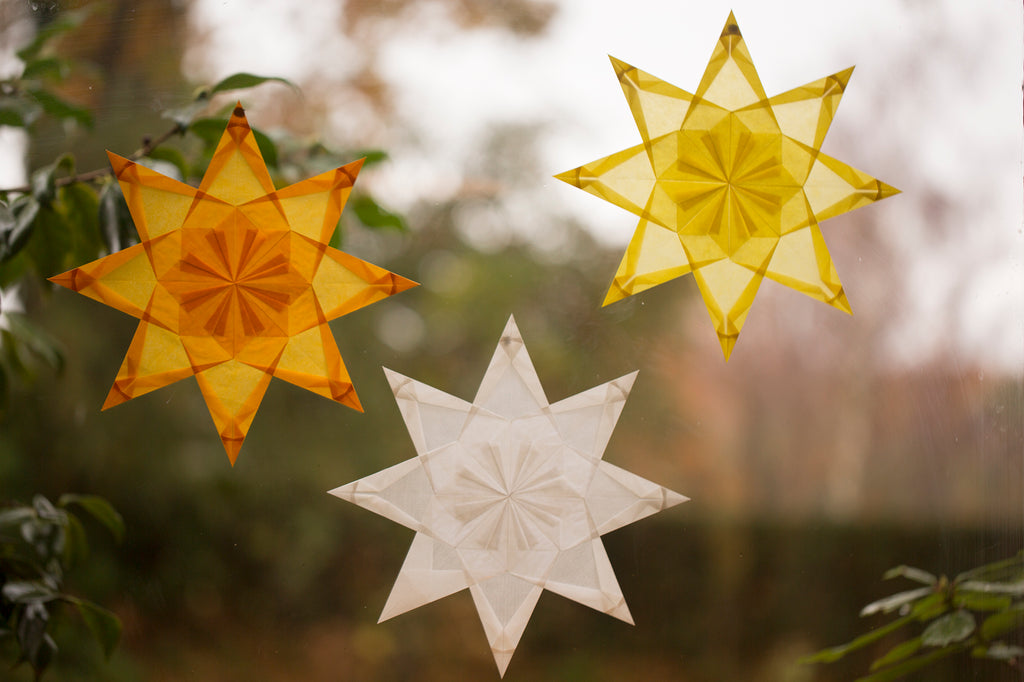
Christmas Craft Ideas For Kids - Stained Glass Paper Star

Last year, our craft blog on simple Waldorf-inspired paper stars was so popular, I thought I'd add a slightly more complicated version for you to make and decorate your Christmas window. I would recommend creating this star with children 6+ as it is a little more fiddly but looks amazing and actually just needs a little practice.
You will need: Kite paper & glue
Prepare your kite paper by cutting in half to make a rectangle - cut 8 pieces.
Creating your crease lines
1 - Fold your rectangle paper in half. This is your centre crease line.
2 - Fold tips 1 & 2 to your centre line, creating a point.

3 - Your shape should look like the start of a paper plane. Next fold the two outer tips (1 & 2 ) to your crease line, see image below.

4 - Your shape should look like image below.

5 - Unfold your paper; crease/fold lines are complete. Ready to start folding your star.

Folding Star - this is where it can get a little tricky, have a practice run first if you are not confident.
1 - Begin next stage by folding your two tips to crease no 2 & 6. See image above as reference.

2 - Fold the two corner tips to crease no 3 & 6, fold the two top tips to your centre crease.

3 - Your shape should look like this.

4 - Fold the outer points to your centre fold, see image below.


5 - Your shape should look like this.

6 - Fold the two sides on the opposite side of your sharp point, the shape should resemble a mini kite.

7 - Fold the centre points back on to themselves, do this on both sides.

8 - Fold the points back onto themselves.

9 - Your final folds are complete - do this process to the remaining 7 cut pieces. It does get easier and quicker the more you do!

10 - Your 8 star points, ready to assemble.

11 - Turn your folded shape, so the folds are facing the table, add glue to the back right corner and place the next folded shape on top of it.

12 - It should look like image below.

13 - Stick 7 points all the way around.

14 - Your star should look like this, ready for the final point to be glued in place.

15 - For your final point, glue on the front, feed it through and glue on the back. All done!


16 - Stick on window with a little blue tak.