Craft Ideas for Kids | Straw Star Tutorial & Wreath

I hadn't touched a single Straw Star before embarking on this blog so you've got to trust me, this is totally do-able. It's one of those things where the first one takes a while and then, once you realise you can do it, you're away. The kids and I have made dozens of them this week.
The instructions that come with the German Straw Star kits have really clear steps and photos, and they are accompanied by a translation of the text by Conscious Craft. This blog also follows on from another tutorial which you can find here. The details and tips provided in those resources are so fantastic that instead of repeating them I'm just going to give you a taster here, along with profiling a different style of star.
You will need: 8 point Straw Star kit, Ruler, Scissors, Thread, (the kit comes with some in red but if you want something a bit more glitzy). And if you want to make the wreath you will also need a Hoop and some Superglue.

1. The first thing you need to do is split your straws. The kit comes with this amazing little device for enabling you to do just that. It's highly satisfying - everyone will fight over who gets to split the straws.

2. Then you need to cut your straws to size. For the coloured ones, (or the ones you want to form the simple crossing star that lies on top), you just need to cut your pieces in half. For the natural coloured ones, (the ones that form the more complex star underneath), you need to cut 3 inch pieces.

You can, of course, just cut all of your pieces in half and then trim them down to the size you want at the end, but if you do the 3 inch thing it leaves you with small leftover pieces that you can use to make mini stars with on the smaller mould. Fiddly, but worth it I think!

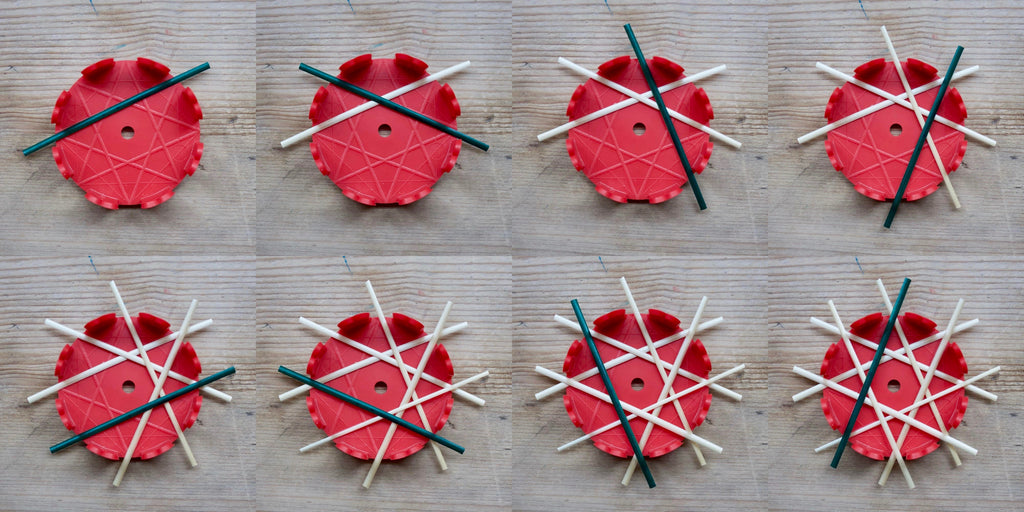
3. Lay your natural straw pieces onto the mould. (I have used a green straw to show where each of the new ones go in sequence):
4. Lay your coloured straw pieces onto the mould.

5. Push the clamp down onto your star to hold it in place.

6. And now for the binding. Make a secure knot around one of the points, take the thread up to the next point and wind it round, first over the whole thing and secondly between the coloured straw pieces and the natural ones. Go all the way round like this until you reach where you started and tie another secure knot.

7. Remove the clamp and push out your star. Now it's time to trim the ends of the points as to how you would like them.

And that's it! You've made a straw star! Or, a small galaxy, if you are like us.

Now, what to do with them? We already have so many tree decorations and garlands, but... we didn't have wreath! (This is where the hoop and the superglue come in).

I just stuck them all around and layered them on top of each other, and then strung one up in the middle. 
And suddenly our house is feeling very festive! I hope yours is starting to take shape nicely too.
