Craft Ideas for Kids | Origami Gift Boxes

I remember reading a quote when my daughter was really little that said something like 'Cherish whatever your child gives to you as it may be all that they have to give'. It really touched me, and made a difference, I think, to all the little offerings I have received over the years.
Children love to give, completely selflessly, so it's nice to take a little time out at this time of year to help them put things together for friends and family. Whether you have the time to make things or need to run to the shops doesn't matter, if thought and care have gone into the presentation then that is a gift in itself. This year, for the first time, we have made our own gift boxes.
You will need: Square pieces of card, (ours are approximately 30x30cm), A hole punch, Ribbon.

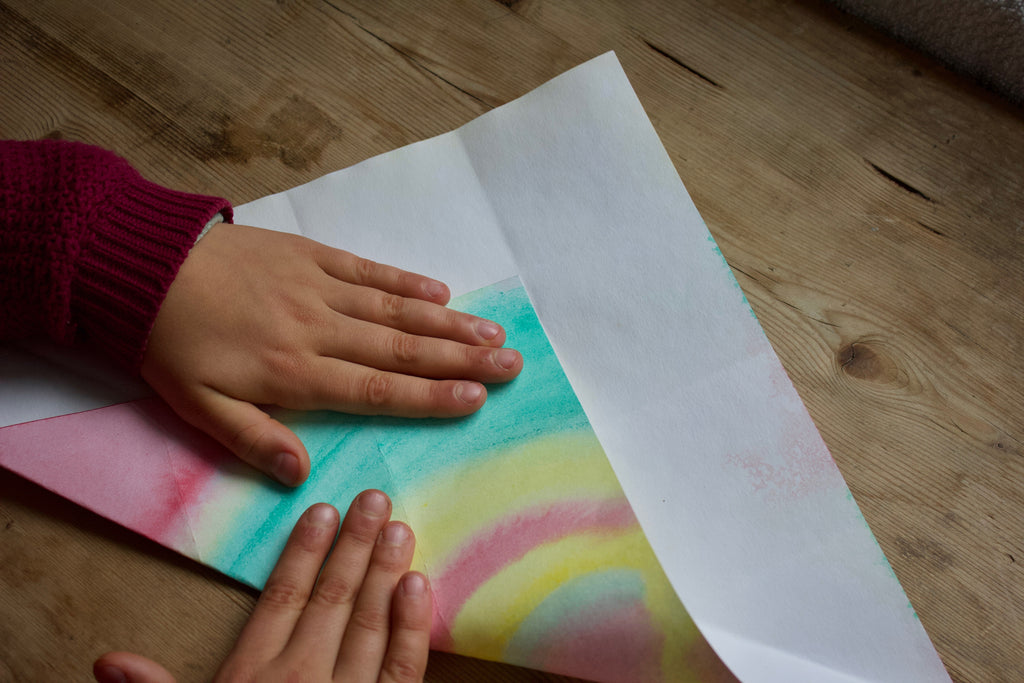
For our pieces of card we did some Wet-on-Wet painting. I'd never dared to do this at home but I followed this tutorial and it was all so much easier than I had thought. It was also the perfect wind-down activity at this busy time of year.
The boxes begin with a lot of folding and hopefully this grid I have drawn will make it easier to understand what I am referring to in the instructions:
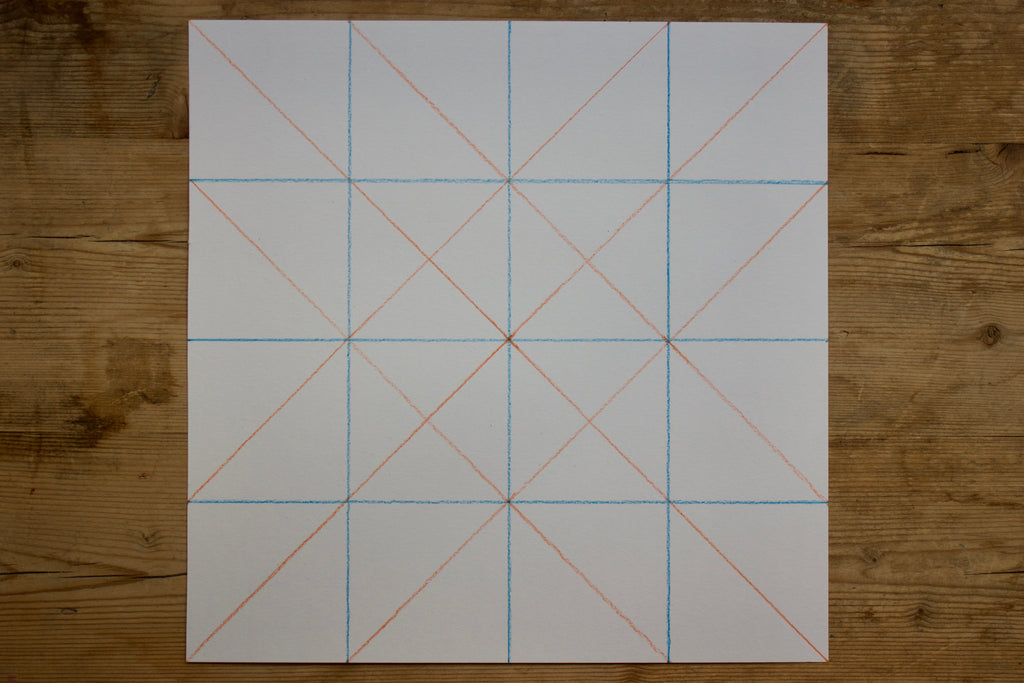
1. The blue folds. Fold your card in half and open it again, then fold both sides into the middle and open them again. Turn your card and do the same with the sides that haven't been folded yet. Your folds should look like the blue grid.


2. The orange folds. Fold your card in half from corner to corner and open it again. Then take each corner three quarters of the way up to their opposite corner, fold and open again. Your folds should look like the orange grid.

3. Fold each of the corners in so that their tip reaches the top of the first square. Leave them like that.

Tip: The crisper your folds are the more easily your box will come together.
4. Punch holes either side of your corner folds, on the other side of the diagonal fold line. Then punch two extra holes either side of one of your corner folds, this time between the diagonal and straight fold lines, (see purple arrows).

5. Pushing the card between them forward, bring together the edges of two of your corner folds, press and release. Do this all around.

6. Pushing the card forward, bring together the upper corners of your corner folds, press and release. Do this all around.

7. Starting with one of the holes that can be seen from the outside, (the purple arrow ones), push your ribbon through and then weave it through all the other holes until it reaches the outside again.

8. Pull your ribbon tight, tie your bow, and watch your piece of card transform into a beautiful faceted gift box!

If you would like to be able to fit a few more things into your box you can staple the fold from step 5 together and trim off the excess card.

And now you can enjoy filling them!


